
Designing a memorable canopy tent activation isn’t just about choosing a color and printing a logo — it’s about the impact it has on attendees and the ease with which your team can engage with them.
Whether you’re hosting a high-volume sampling event, a premium outdoor activation with live demos, or a branded footprint for networking at a major trade show, the details of how you design your canopy tent activation can dramatically impact visibility, flow, and engagement.
And with attendee expectations rising every year (more interactivity, more polish, and more intentional design) smart brands are rethinking how they use tents as the centerpiece of their footprint.
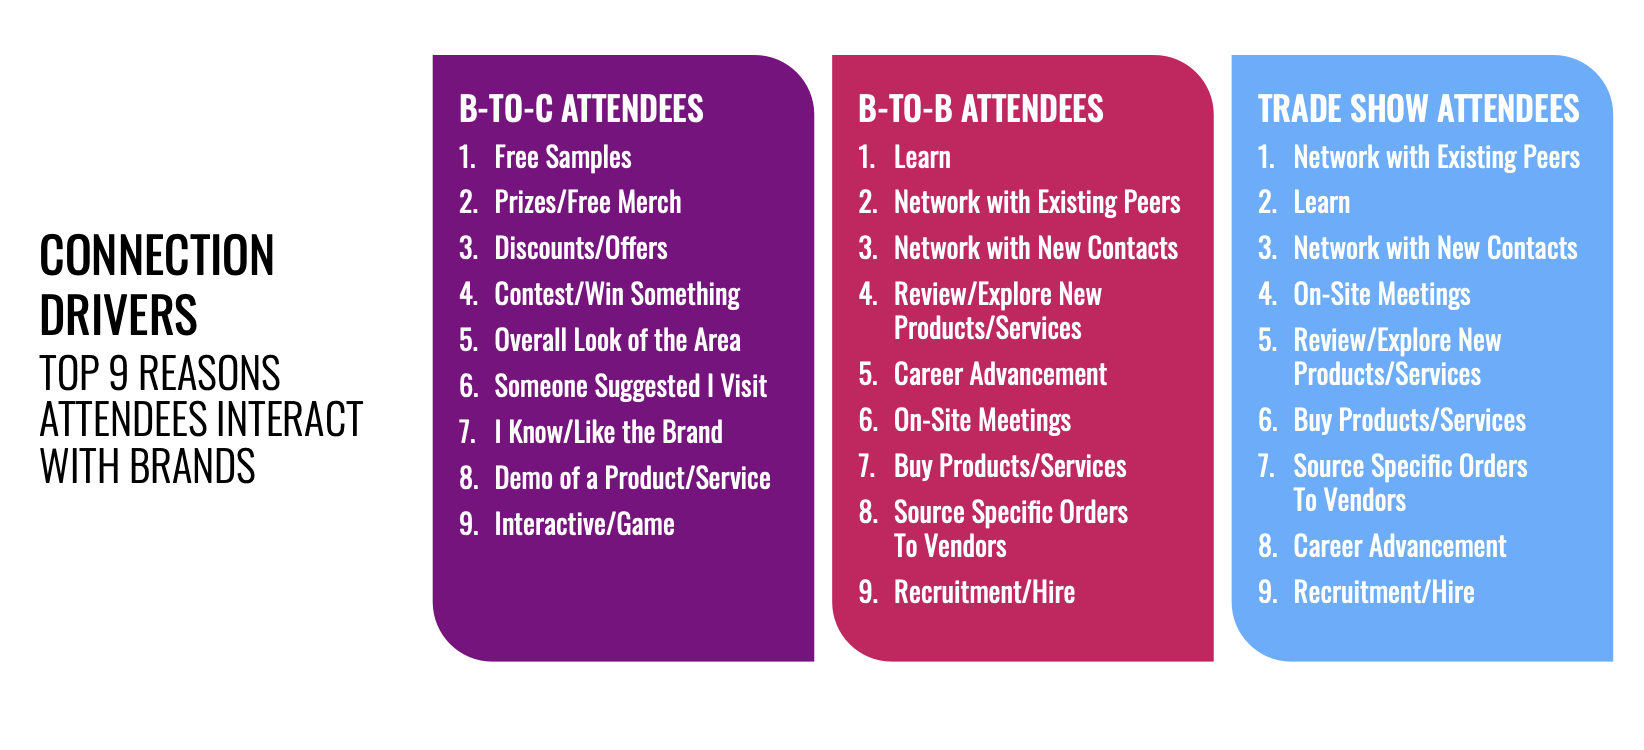
Source: EventTrack 2025
Knowing this and with the above attendee survey responses, we’ve put together 10 tips that will help your team design a canopy tent activation that’s more functional, more unique to your brand, and more effective.
Table of Contents:
- Use Height to Grab the Eye From a Distance
- Resist the Urge to Overcomplicate Your Printed Canopy
- Consider Differentiated Roof Styles to Stand Out
- Work With Vendors Offering Dye Sublimation + Edge-to-Edge Printing
- Build With Activities in Mind to Draw Attendees In
- Make Sure the Footprint Has a Welcoming Flow
- Opt for Customizable Walls to Create a Defined, Branded Space
- Invest in Built-In Functionality (Don’t Cobble Accessories Later)
- Design With the Weather in Mind
- (Bonus Tip) Skirt White-Tent Requirements
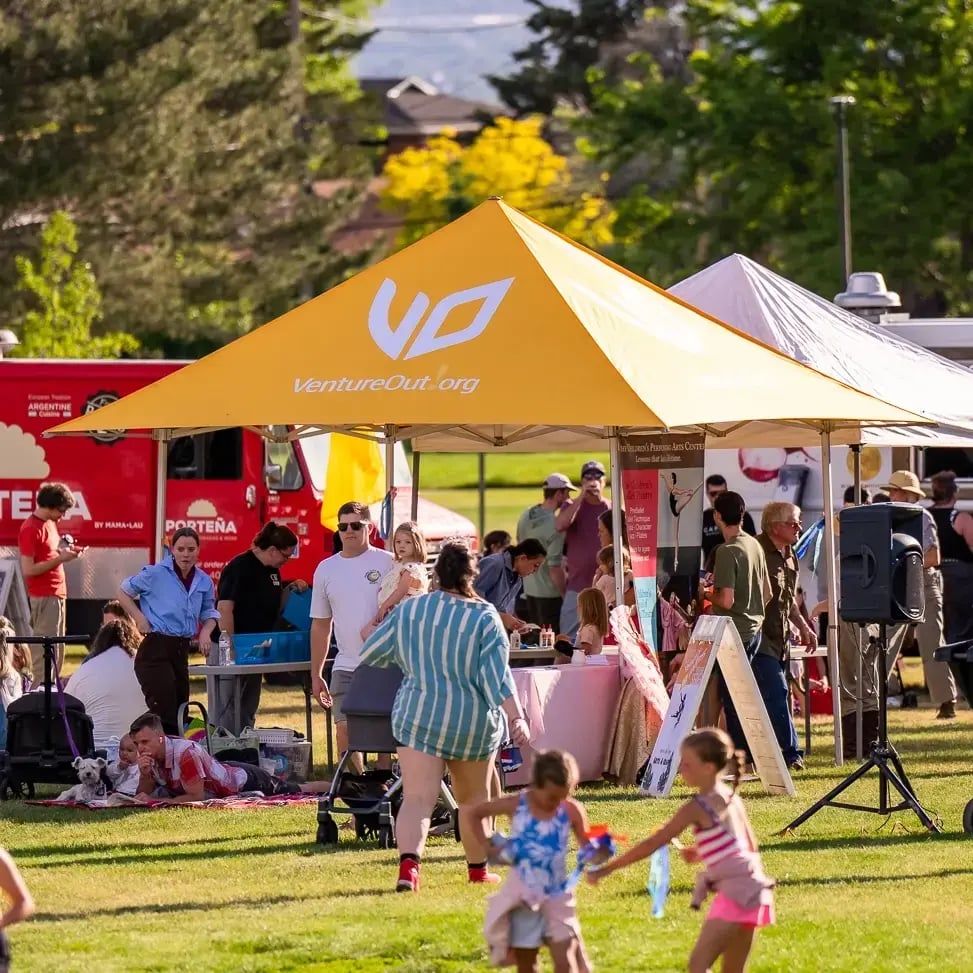
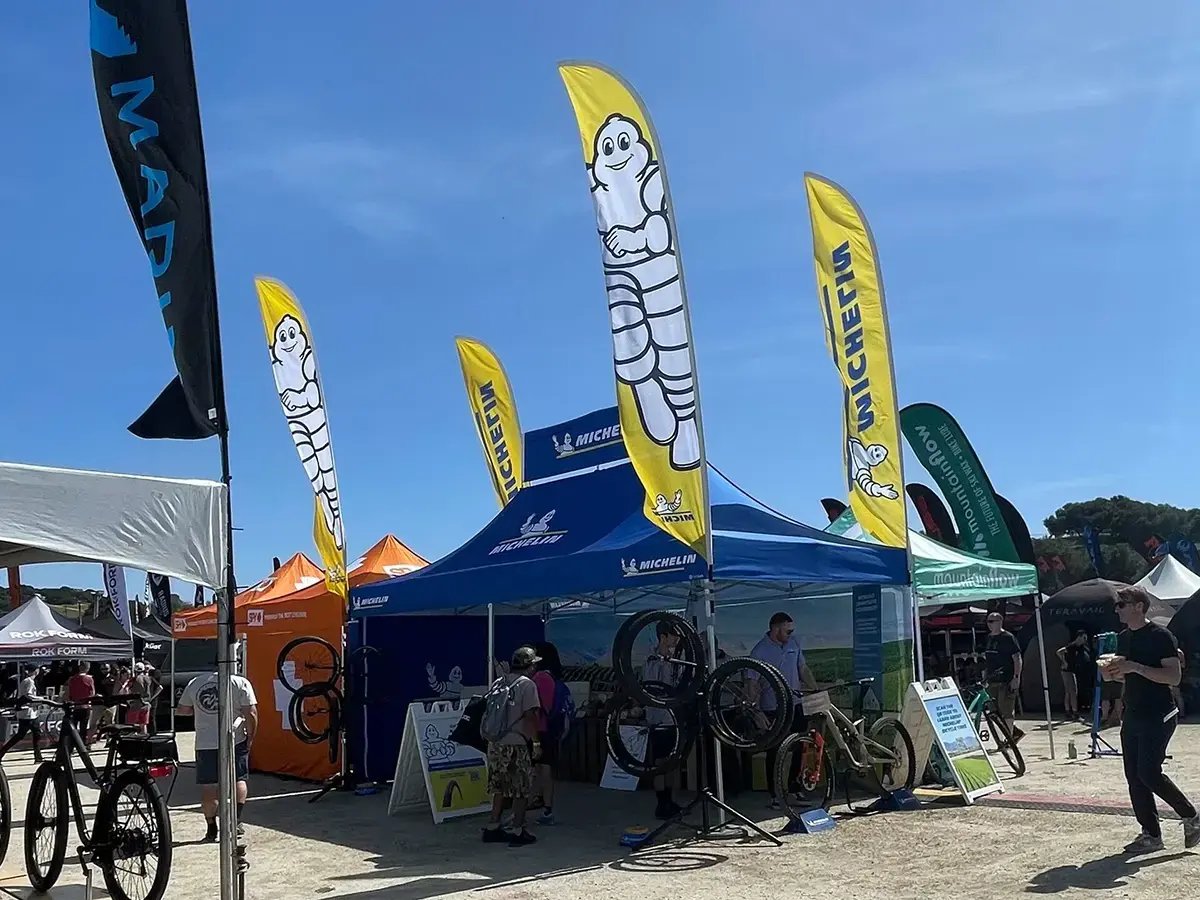
1. Use Height to Grab the Eye From a Distance
In a busy event environment, height equals visibility.
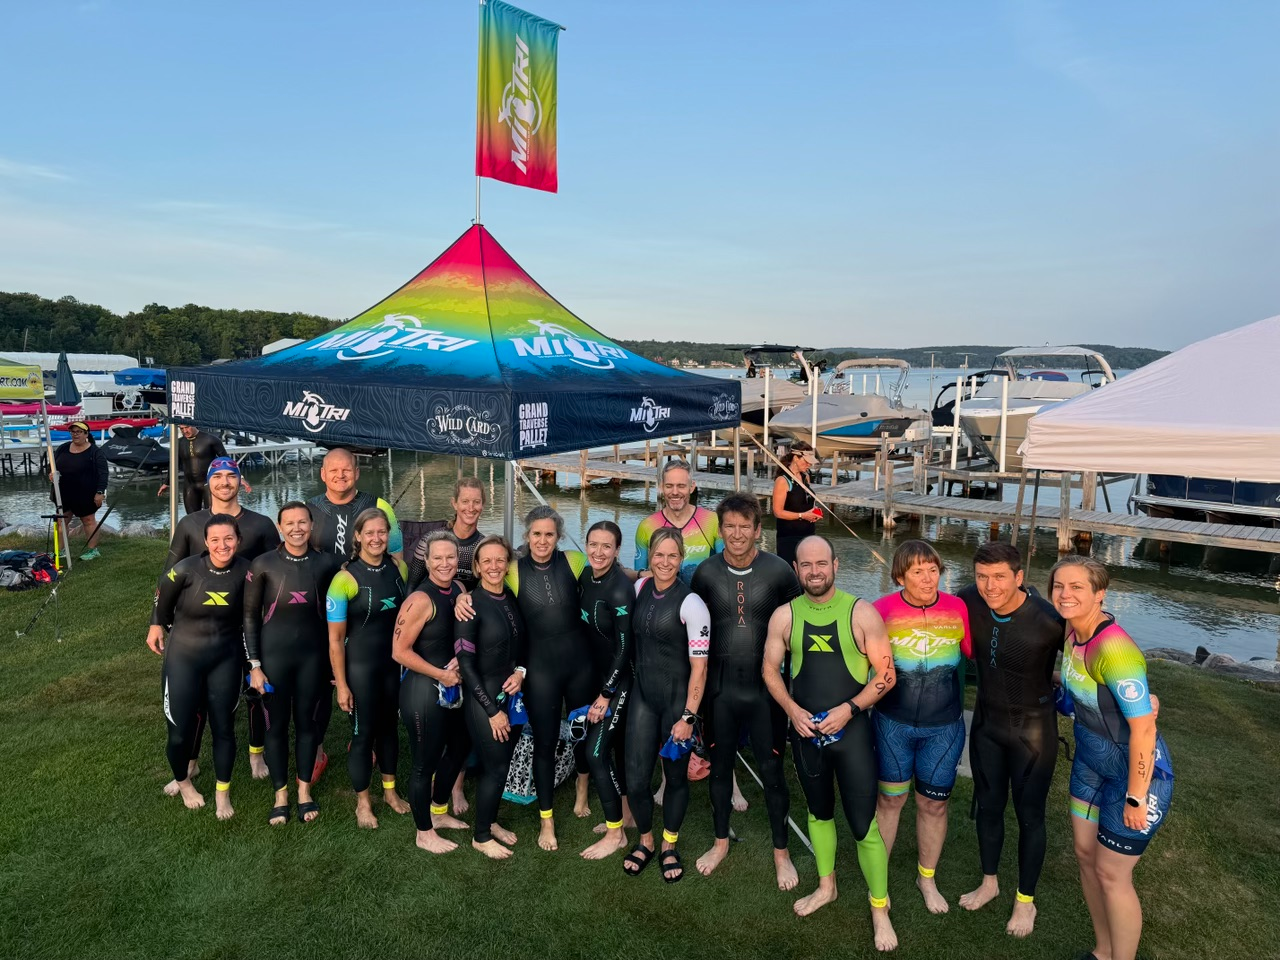
A tent that’s even one foot taller than its neighbor’s gets spotted sooner. And similarly, the activation that utilizes flags, banners, unique roof designs and signage helps bring people in who can spot your brand from far away. It's no mistake that we designed the MONARCHTENT to be taller than our competitors.
In the conventional indoor trade show space, they’ve known this for a long time. Think of the growing number of brands leveraging tools like hanging banners to draw the eye in.

Enhance vertical visibility with:
-
Elevated peak designs
-
Peak flags, frame-mounted flags, and standalone flags
-
Branded roofline banners
-
Perimeter signage that breaks the horizontal plane like scrim or barricade (bike) covers
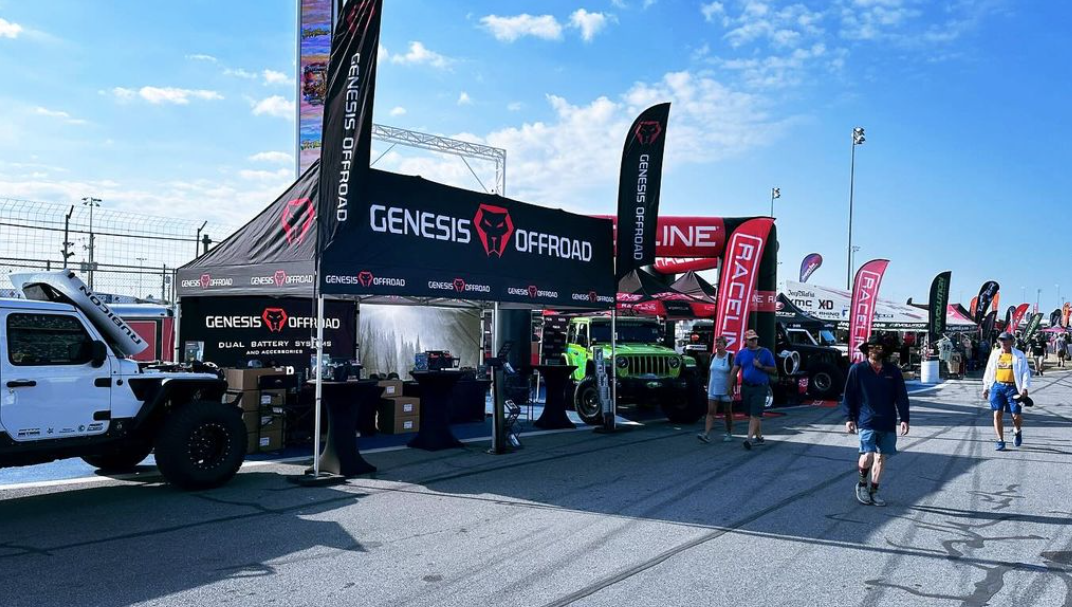
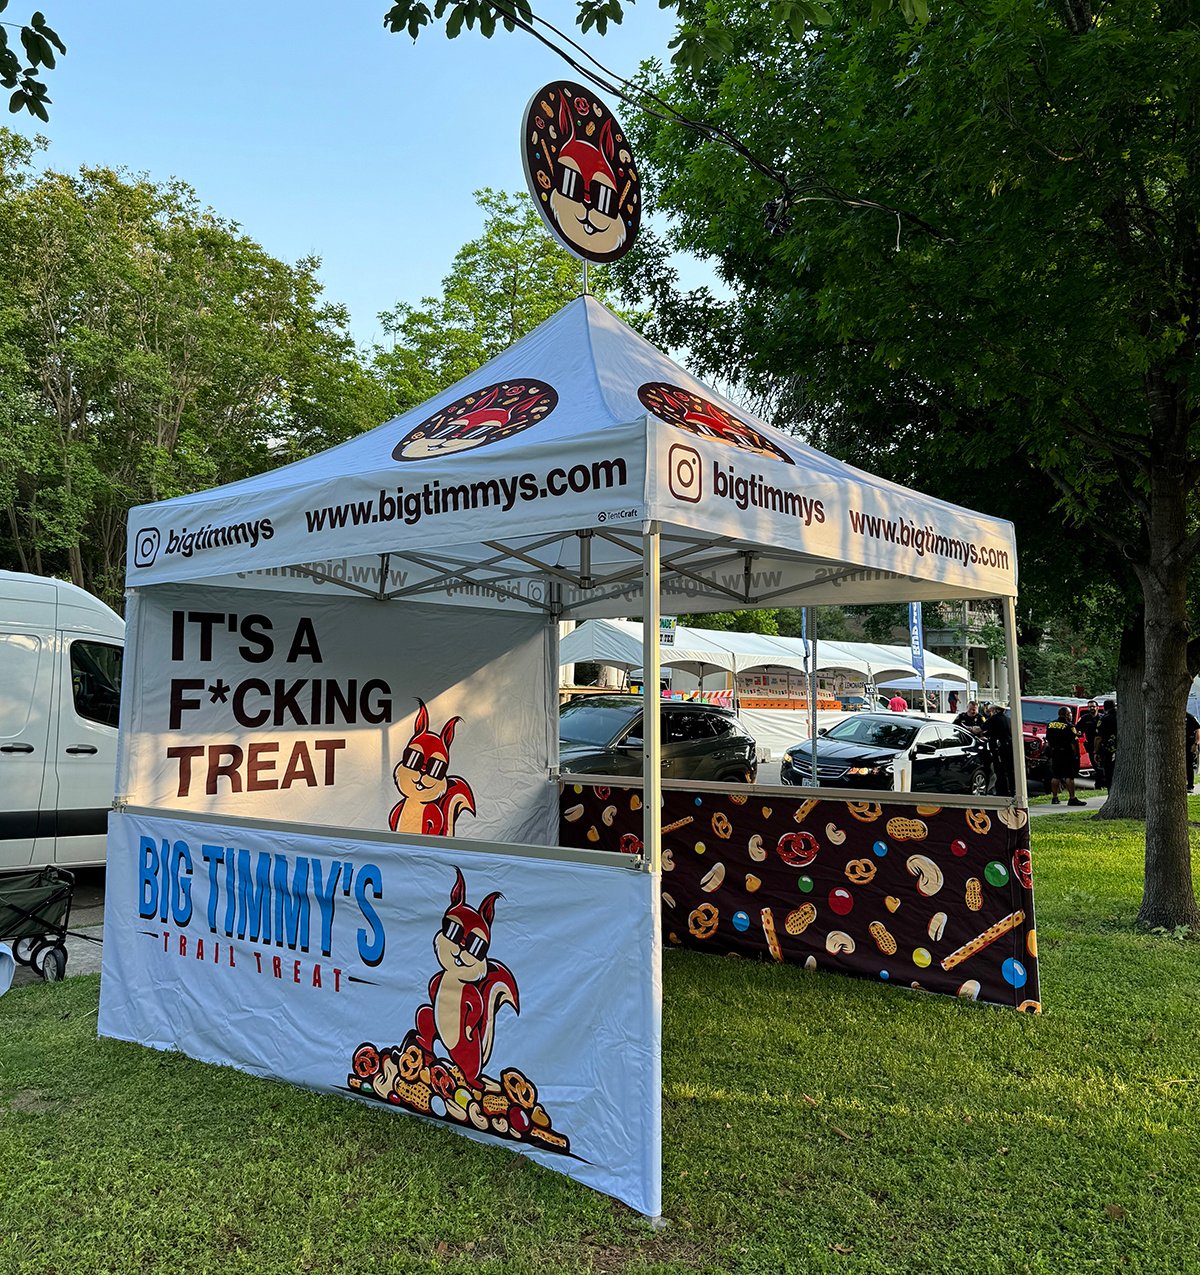
2. Resist the Urge to Overcomplicate Your Printed Canopy
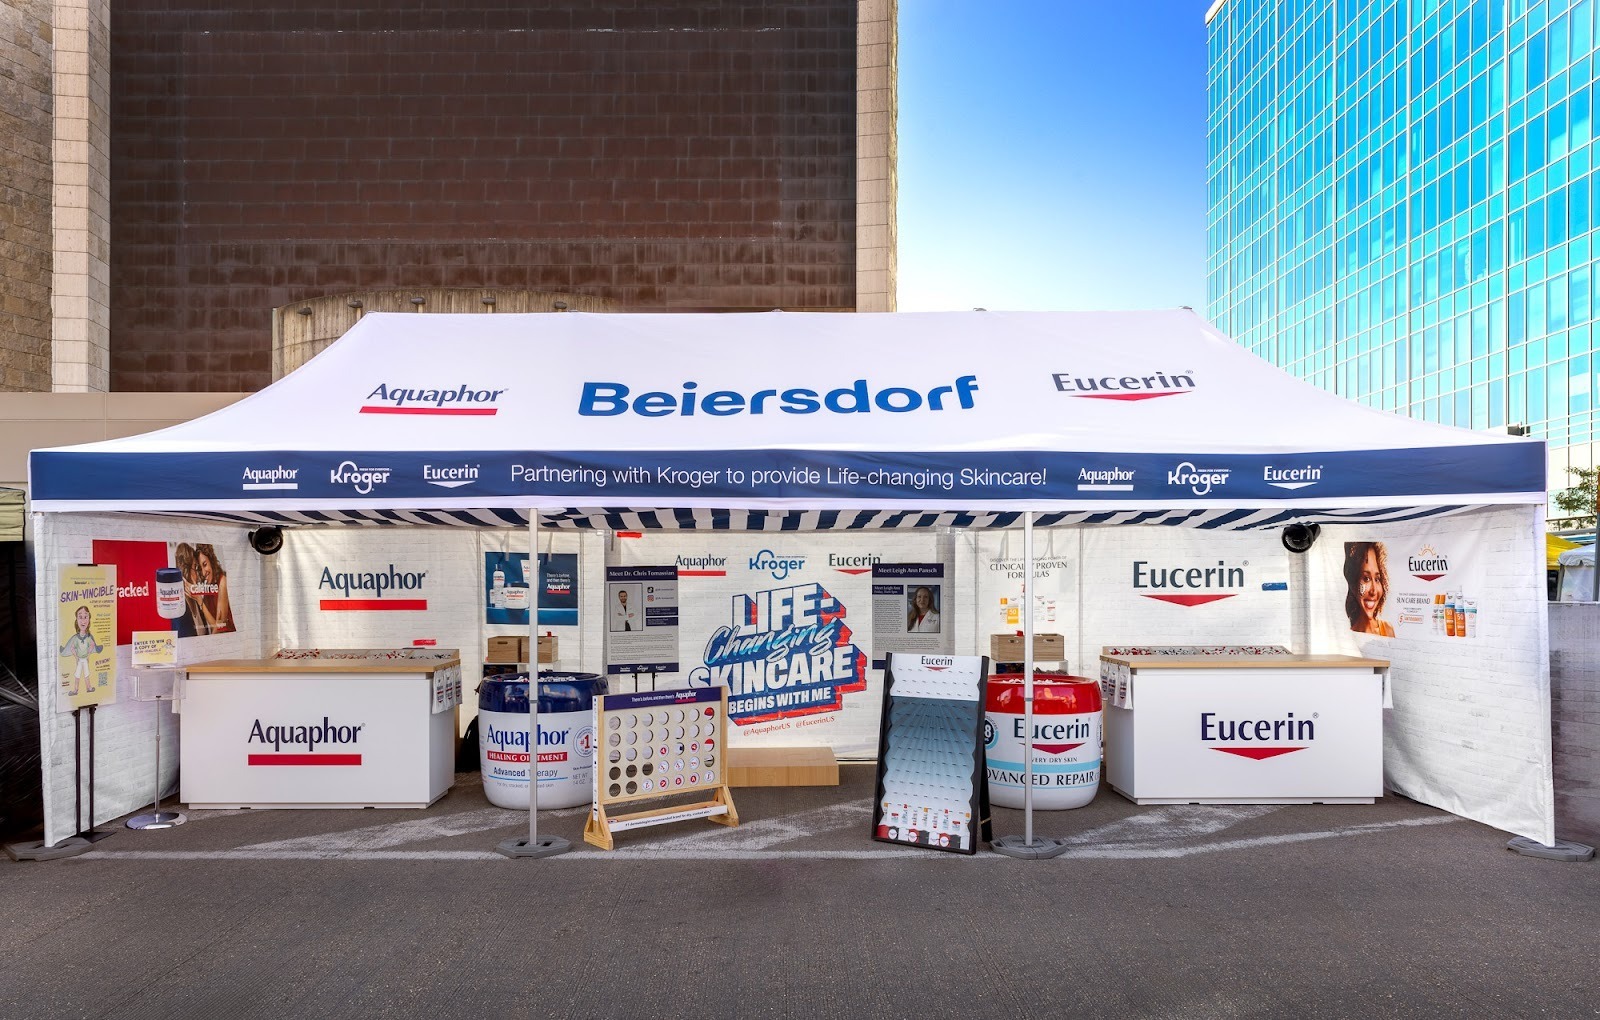
A clean, bold canopy is the #1 factor in whether people recognize your brand quickly and correctly. Overdesigning kills clarity and premium perception.
It’s tempting to pack your canopy with color, patterns, photography, and multiple messages, but the roof should be the simplest design element in your entire footprint.
Why?
Because people view canopies from a distance, often while moving. The most effective canopy designs are:
-
Clean
-
Bold
-
High contrast
-
Easy to understand in seconds
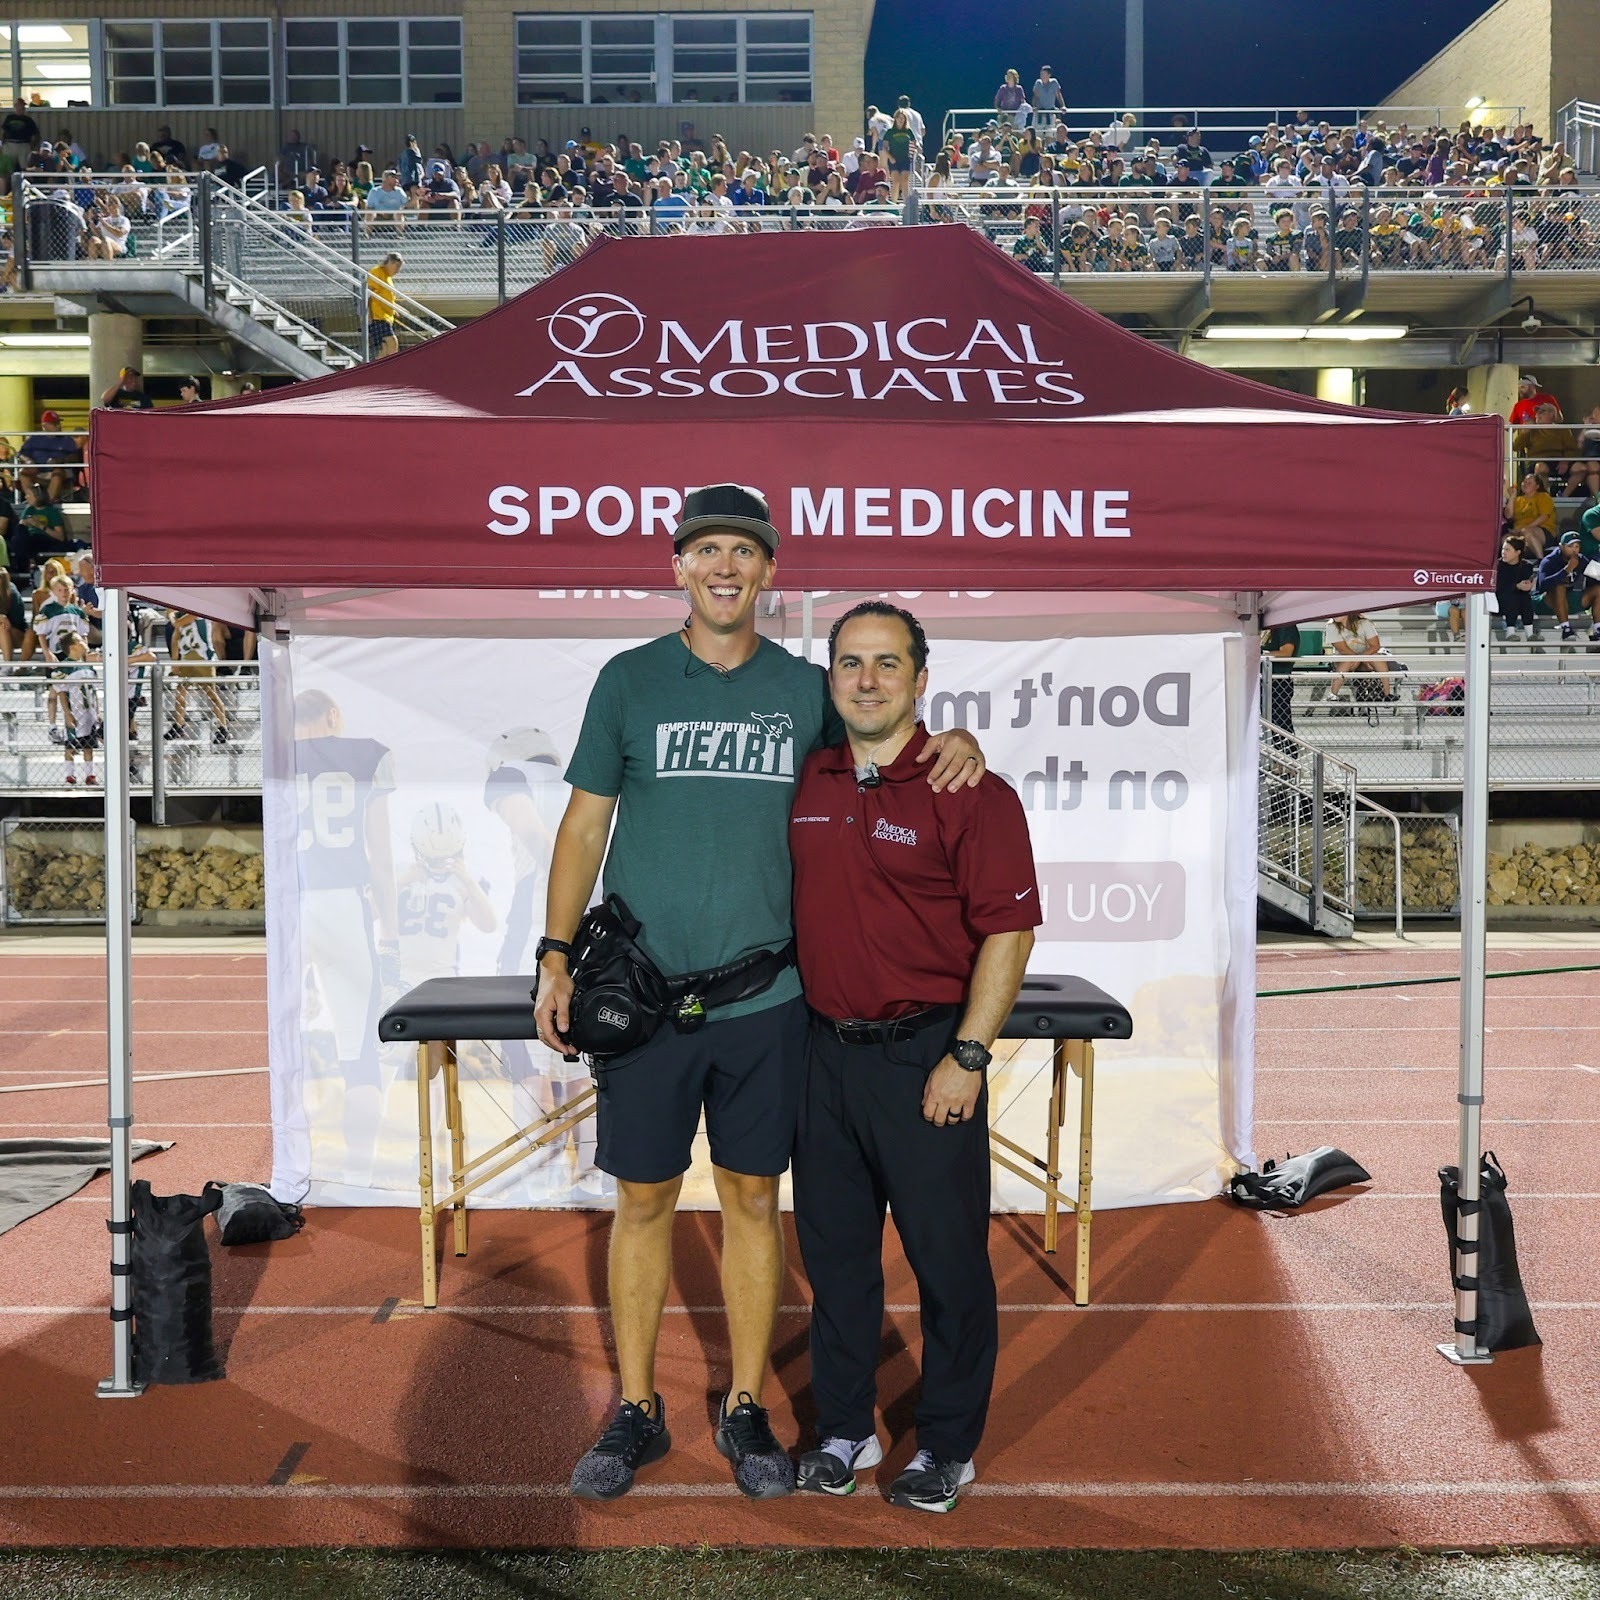
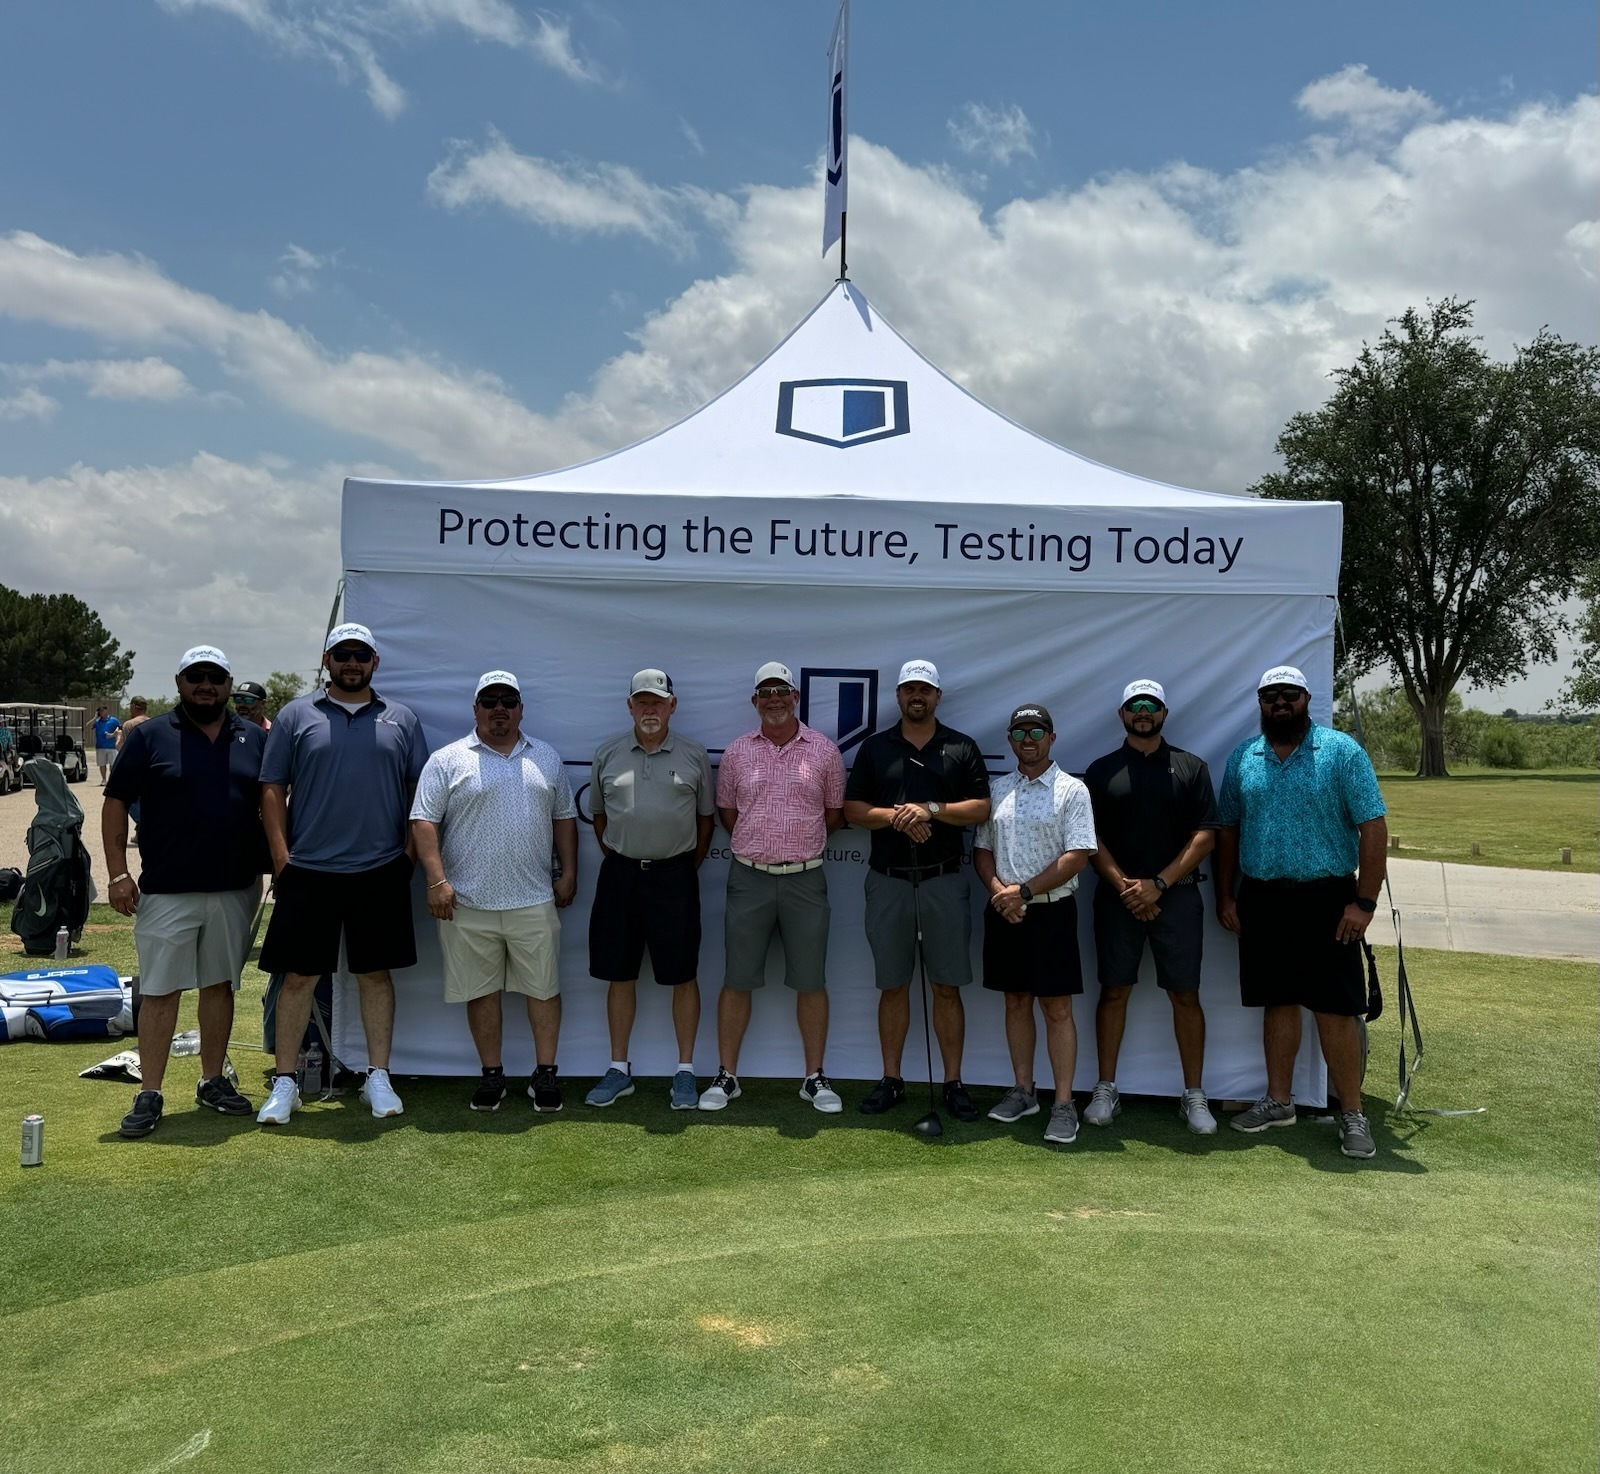
Overly busy canopies often read as “noise,” especially in industries that value professionalism and trust (CPG, healthcare, finance, sports nutrition). A clean canopy with a strong logo actually feels more premium than a roof crammed with graphics.
Save the storytelling for eye-level: walls, counters, signage, product displays, and distinct activations.
Good examples include:

Recommended Reading:
5 Tips to Design the Best Artist Choice Custom Tent
How Canopy Color Impacts the Temperature of Your Custom Tent
3. Consider Differentiated Roof Styles to Stand Out
Close your eyes and imagine a canopy tent. Why did it have a standard peak?
In part, it’s because we just showed you a bunch of images that fit that description, but also because that’s the most accessible and often the cheapest design that gives you the height advantage.
It’s no coincidence that we started offering multiple roof styles on our heavy-duty MONARCHTENT pop-up frames.
This gives you the height you want, but with a unique silhouette that sets you apart in a sea of standard peaks. This often comes with a significant boost to your brand perception. You’re now the company that must have some secret place you buy your tents from.
Fun canopy roof styles to explore:
Pagoda-style Roof (MONARCHREACH)
Storefront Roof (MONARCHSTOREFRONT)

Flat Top Roof (MONARCHFLATROOF)
.webp?width=1500&height=1125&name=10x20_MONARCHFLATROOF_leg_wrap(1).webp)
4. Work With Vendors Offering Dye Sublimation + Edge-to-Edge Printing
Your artwork is only as good as the printing technique behind it.
Edge-to-edge printing allows your graphics to cover the entire canopy panel without awkward borders or cutoffs. In contrast, spot-logo canopies often look cheaper and limit your design options.
Dye sublimation printing is the gold standard because:
-
Colors are more vivid and photographic
-
The print becomes part of the fabric (won’t crack or peel)
-
It handles gradients, textures, and full-bleed illustrations flawlessly
-
It’s ideal for outdoor use and long-term durability
Other techniques like UV or heat transfer can’t match the color accuracy or longevity.
Every company offering custom softgoods deals with weighing the pros and cons of each printing technique. At TentCraft, we offer multiple types of printing depending on the type of fabric we’re working with.
After decades of testing, we’ve found that dye sublimation is the gold standard for our 600D Polyester because the ink soaks into the actual fabric. That’s why you’re not at risk of cracking/peeling like you are if you’re using heat to simply transfer graphics onto the top layer of the fabric.
Dye sublimation also fights off fading for longer than other print methods. It’s part of the reason we’re able to offer a 7-year warranty on our MONARCHTENT canopies (which is longer than all of our competitors).
Additional Reading:
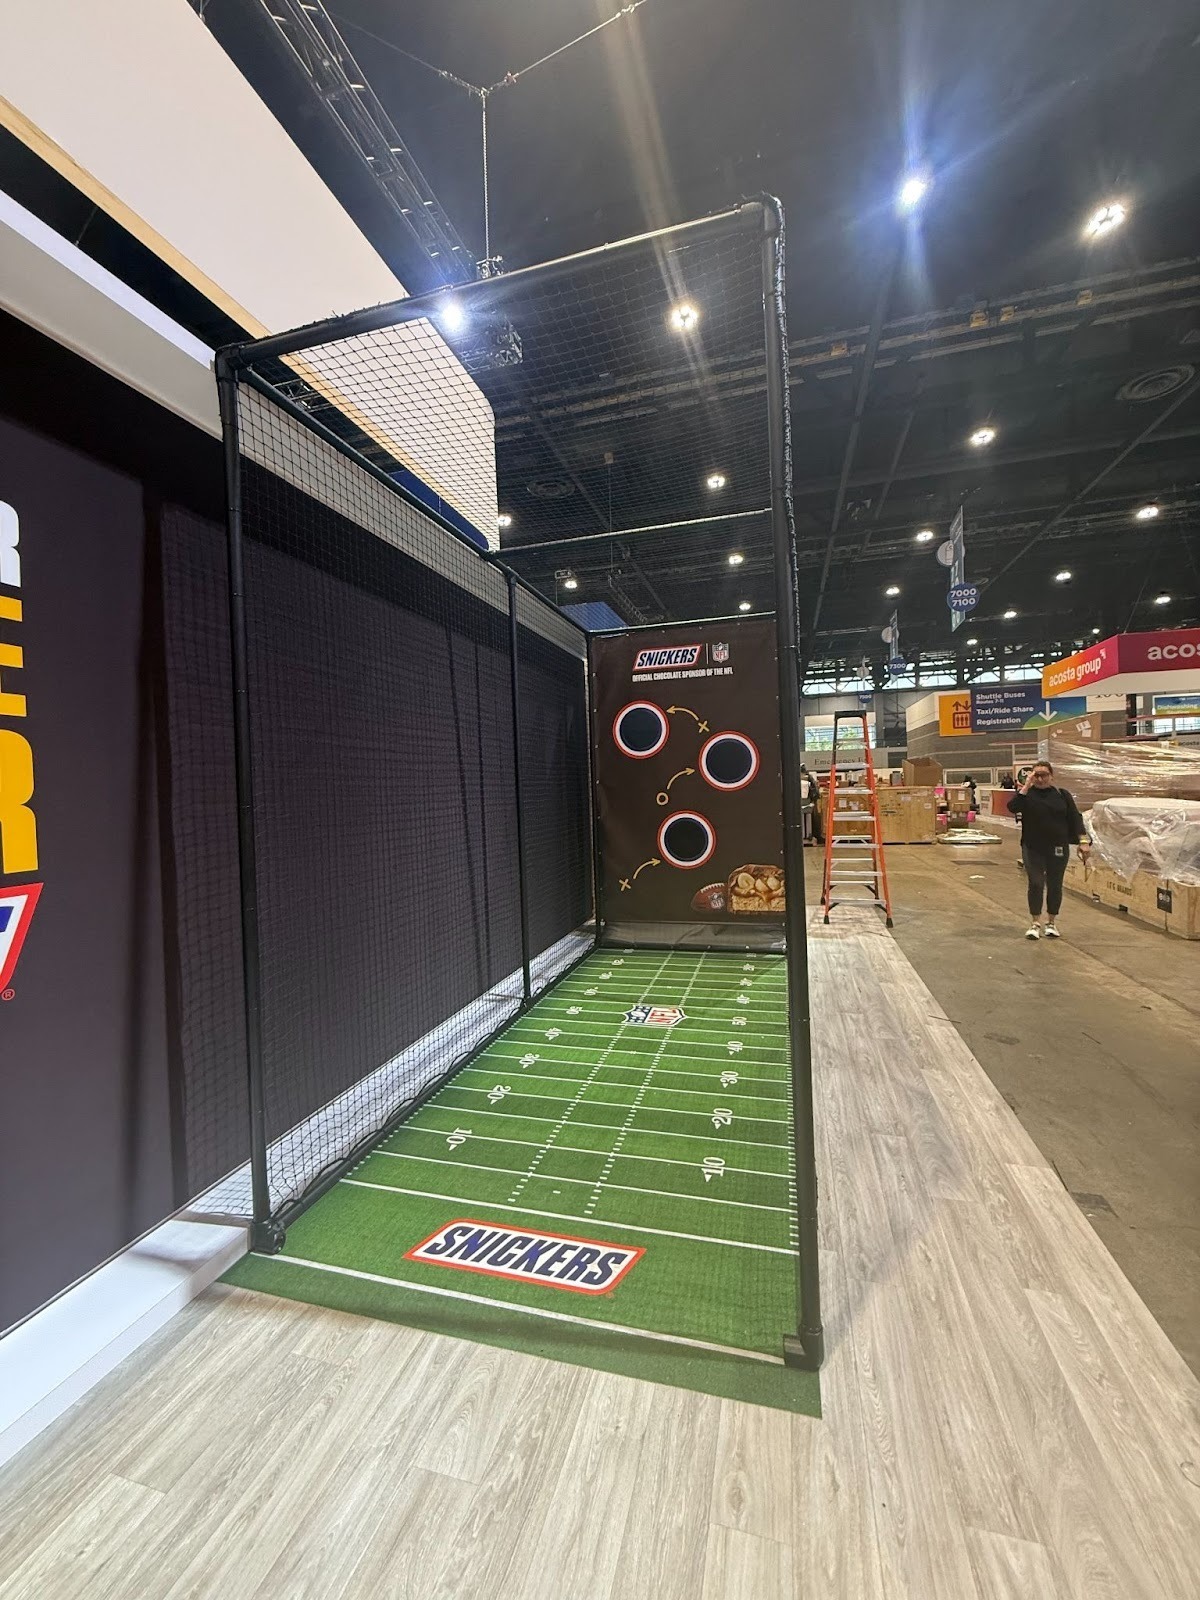
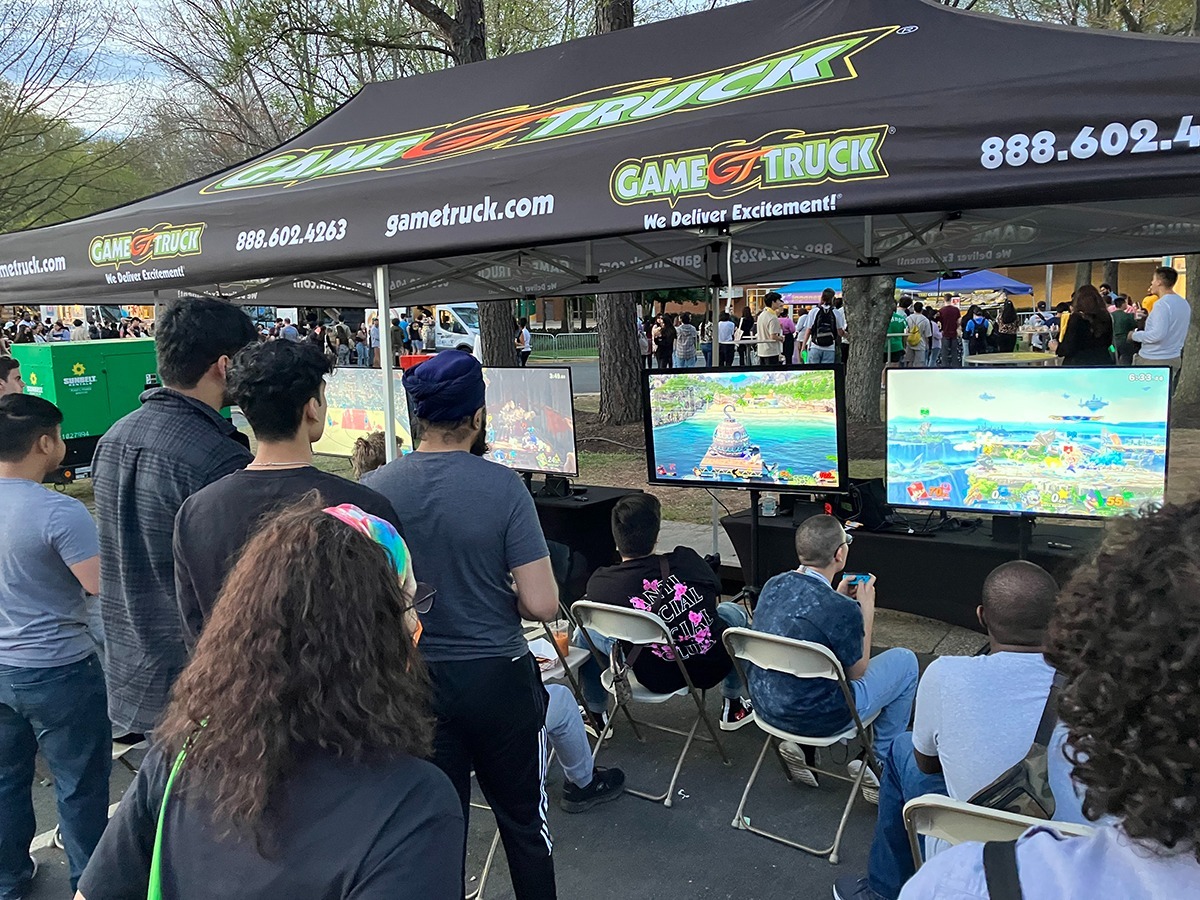
5. Build With Activities in Mind to Draw Attendees In
Interactivity drives participant dwell time, line formation, and social engagement. A beautiful tent means nothing if there’s no reason for people to stop.
Aka the modern attendee expects more than a branded space, they expect something to do.
Interactive elements like the following dramatically improve booth engagement:
-
Games
-
Sampling stations
-
Photo ops
-
Live demos
-
Digital activations
-
Athlete or influencer moments
One of the unique things that outdoor events offer brands is more space so you think beyond the covered tent space. This is where added displays, modular truss setups, etc. can elevate your tent space.
Look at Powerade’s sports stations or Snickers’ fan challenges — these activations pull people in and keep them there.
Recommended Reading: 14 Engaging Event Backdrops for Experiential Marketers

6. Make Sure the Footprint Has a Welcoming Flow
Layout directly impacts how many people enter — and how long they stay.
And while a welcoming flow is entirely dependent on what type of company you represent or what attendee experience you’re offering, here are some of the things we like to talk to our clients about:
-
Entrances: Where do people naturally walk in from?
We can use walls, tables, counters, and signs to better communicate entry point preferences.
-
Queueing and Anchors: Where do you want people to go? Lines are great if they are yours and they’re indicative of people with an insatiable appetite to try your product or connect with your team. They’re not great if they’re happening because of an unforeseen bottleneck.
Are there multiple places for people to engage with your brand under your tent? Can we help identify segmented spaces for games vs. samples vs. product demos? Are tables, walls, fencing, or counters positioned to allow people to flow through your activation rather than communicating that people should wait to be helped. Could overall signage be improved to help educate attendees to make quicker decisions prior to entering your booth space?
-
Furniture: Does it invite or block movement?
While furniture is inviting and encourages longer stays in a booth, it’s often a question of practicality with furniture. Do you have enough? Is your covered space large enough to allow for all the furniture plus clear walkways? Can you use inflatable furniture? Would tall tables for standing networking work better than small tables that require chairs? Or do you need people to feel relaxed and comfortable in a more private or intimate space?
Size impacts how someone feels underneath the canopy, but also determines what you’re able to offer as far as a covered experience. A 10’x20’ and 20’x20’ canopy tent can offer plenty of space to set up and display products (even larger products), giving your customers a shaded shopping experience.
A 10x10, limits both the size of the products you might be able to conveniently move, and also whether or not you even want attendees to actually be under the tent. It does make sense though for teams where shows offer smaller footprint, like farmers markets, or community street festivals, and where ease of transport is a big consideration.
The goal is to create a space that feels purposeful and intuitive — not cramped or confusing. Check out some off these examples of space usage:
.webp?width=1280&height=1005&name=mightyTABLE%20Photo%20(3).webp)

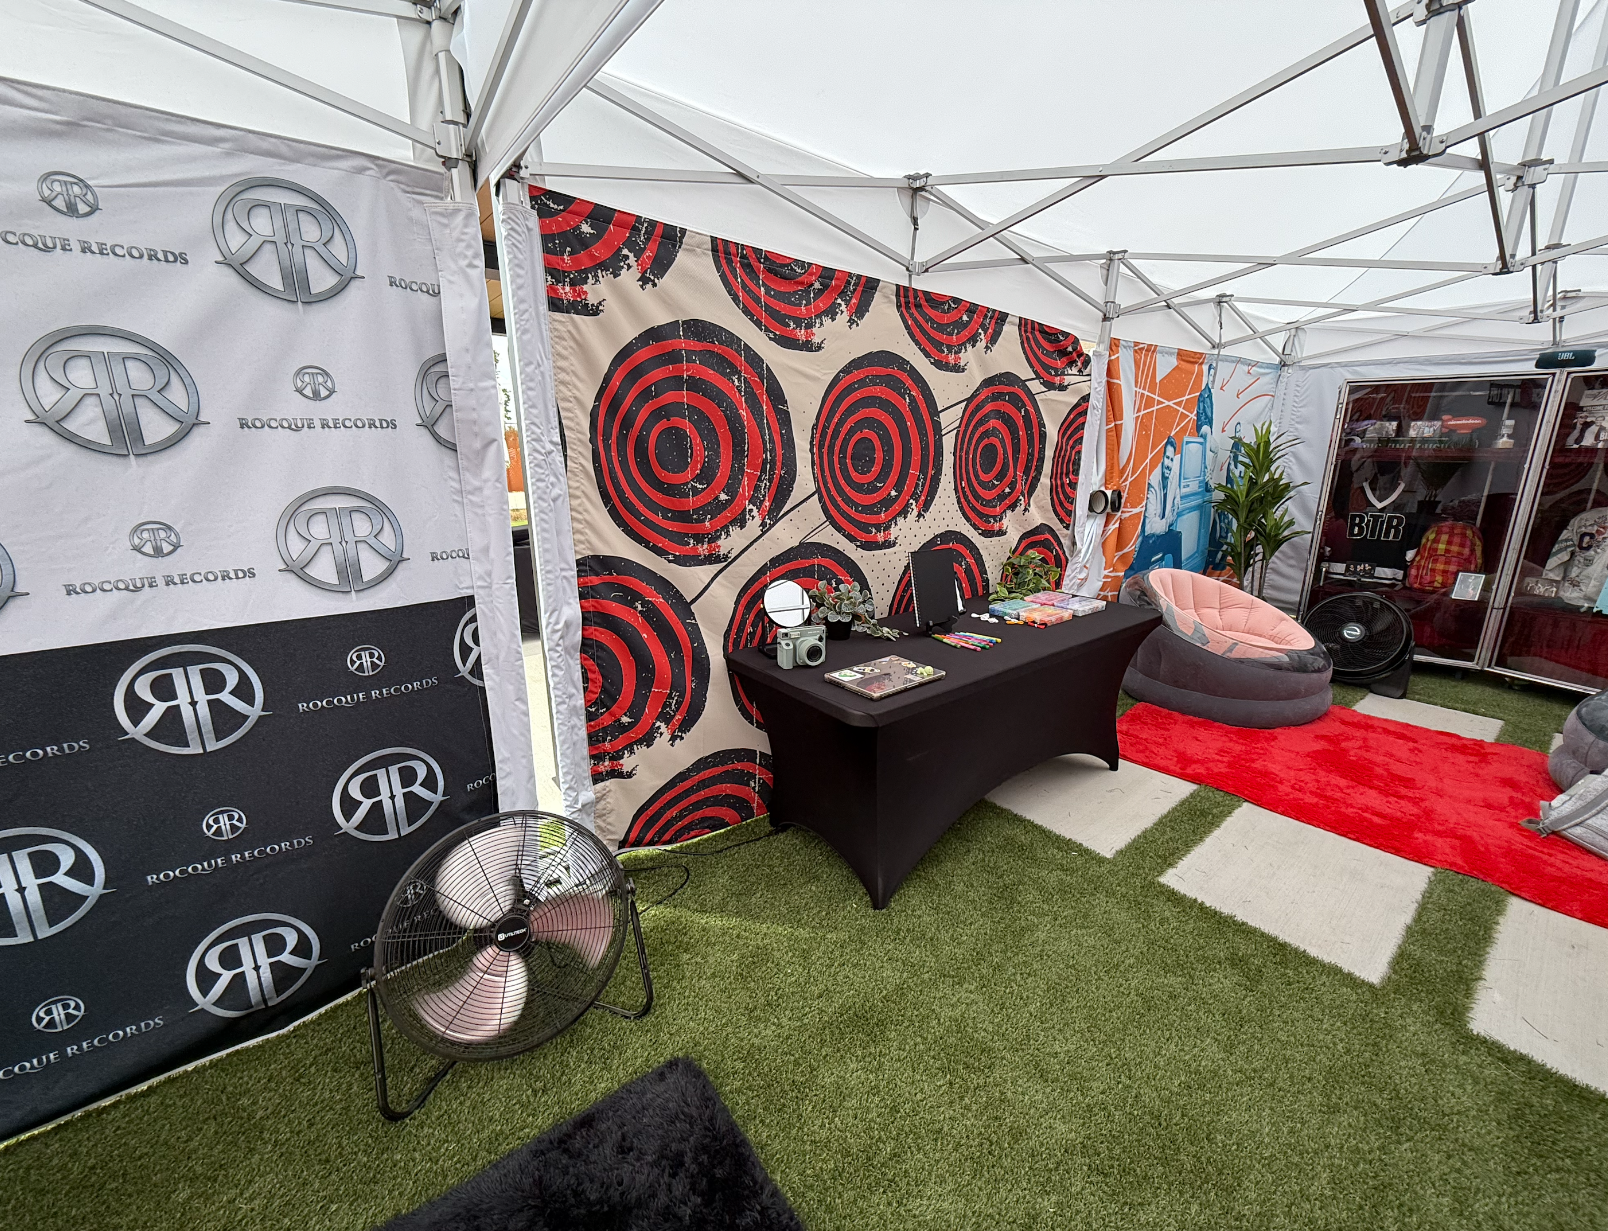
7. Opt for Customizable Tent Walls to Create a Defined, Branded Space
Walls are one of the most underrated design tools in a tent activation. They help you:
-
Block wind, sun, snow, or rain
-
Add privacy for demos or hospitality
-
Reduce noise from neighboring exhibits
-
Provide more square footage for graphics
-
Create natural zones within your footprint
You’ve probably felt it before while walking around a local event or outdoor tradeshow. When a tent doesn’t have walls, whether half or full, the wide-open flow can unintentionally create the feeling of chaos.
Attendees are left wondering where to enter, possibly feeling socially awkward or vulnerable, which might mean feeling hesitant to enter at all.
Additionally, at packed shows, seeing all of the neighboring vendors’ booths through your tent can add unpleasant visual noise. Even if what they see isn’t yours, potentially seeing the disorganized overstock of someone else’s product can then be associated with your space.
Recommended Reading: Creative Canopy Tent Designs That Feel Like Home (Heavy-Emphasis on Walls)
8. Invest in Built-In Functionality (Don’t Cobble Accessories Later)
It’s not uncommon for less experienced brands to start with a tent and slowly add mismatched tent accessories as they need them. This usually leads to:
-
Poor fit and finish
-
Operational headaches
-
Inconsistent material and branding
-
Reduced durability
Instead, choose vendors whose accessories have been either made or specifically curated for the tent systems they’re selling.
Examples:
-
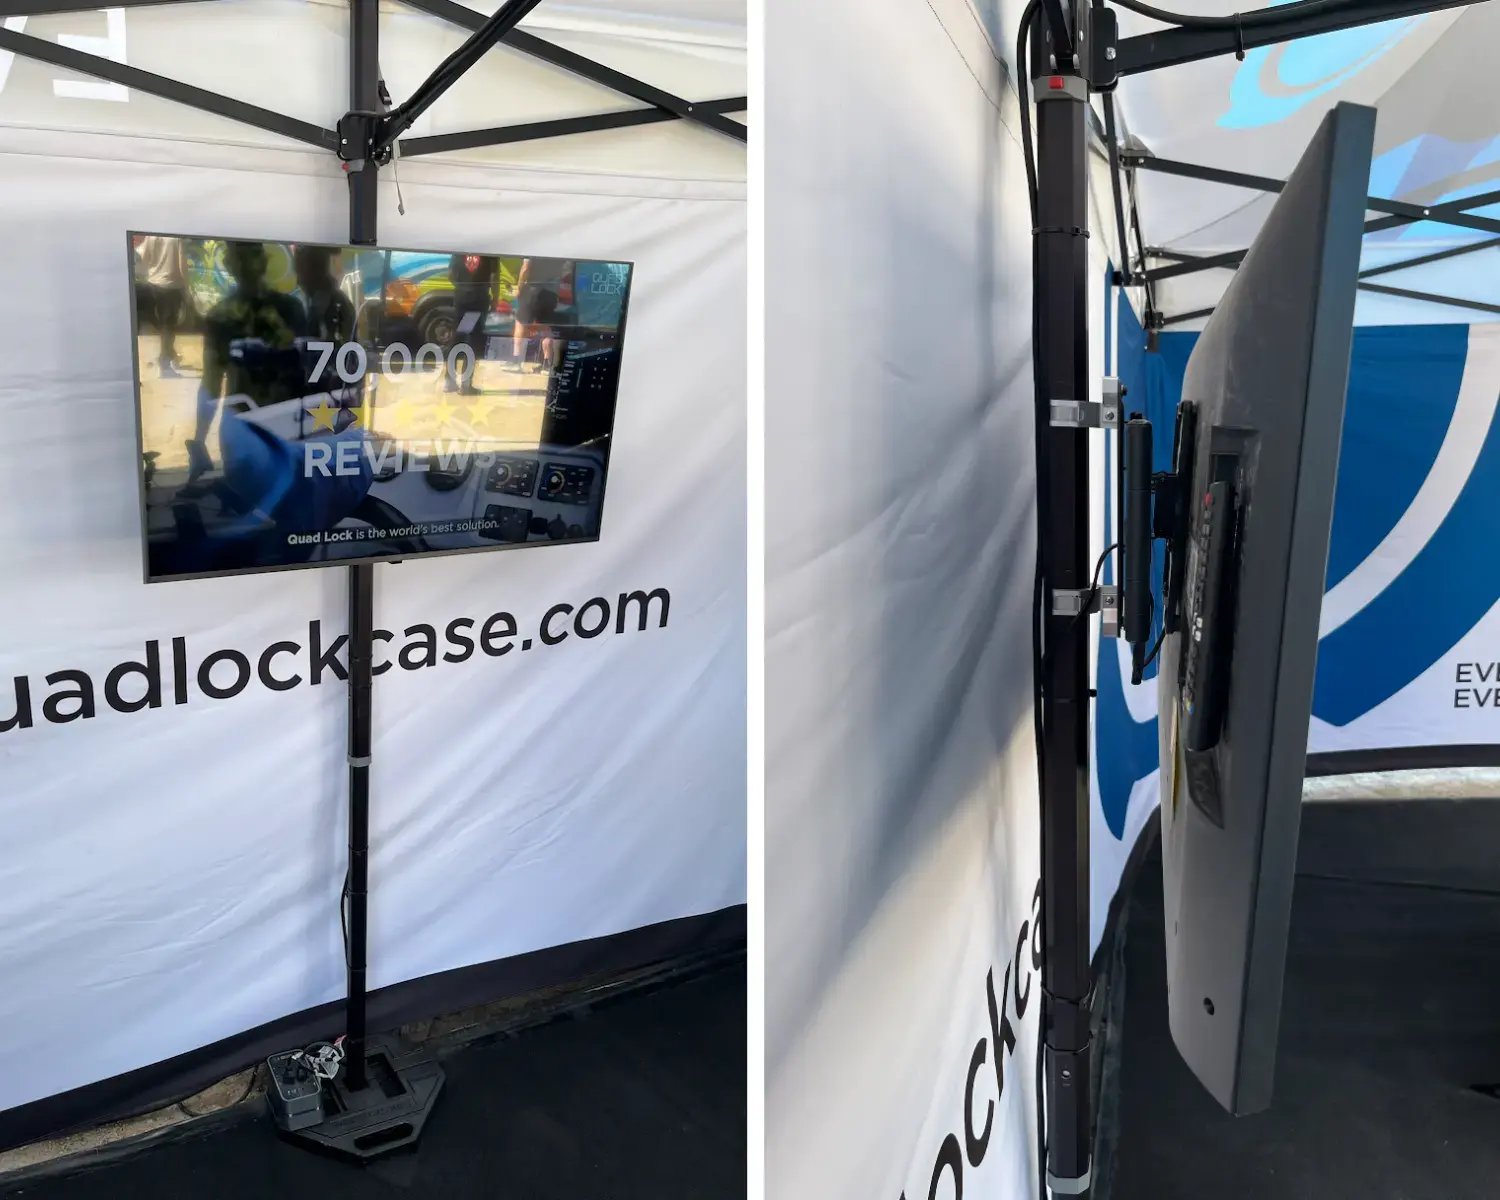
Sampling and serving (food-safe counters that attach to the tent frame, sanitation zones, tv mount options for screen menus and announcements)
-
High-traffic demos (counter systems, internal rigging, AV integration)
Integrated design means everything works together — structurally, visually, and operationally.

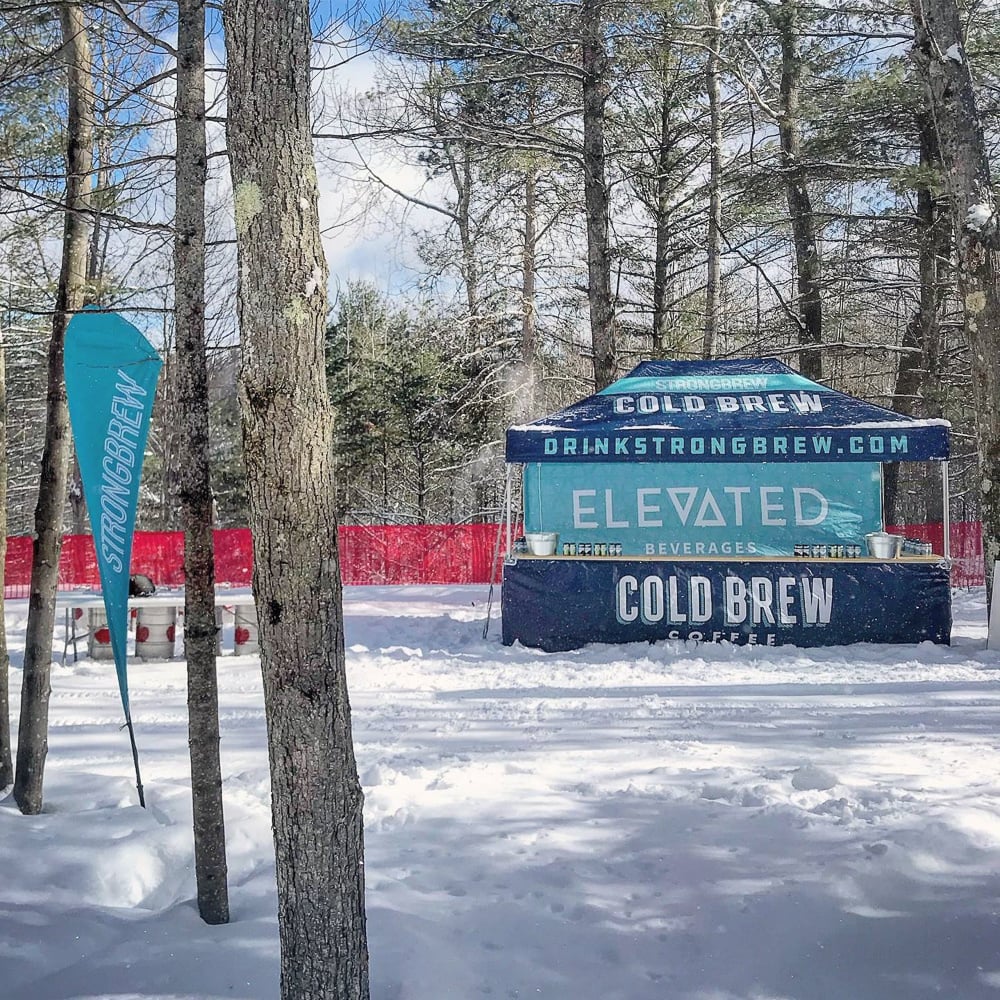
9. Design With the Weather in Mind
It’s not glamorous, but weather should shape your design choices as much as branding does.
It’s one of those instances where the best weather-proofing design features mean you, your team, and your attendees don’t think about them while an event is going on.
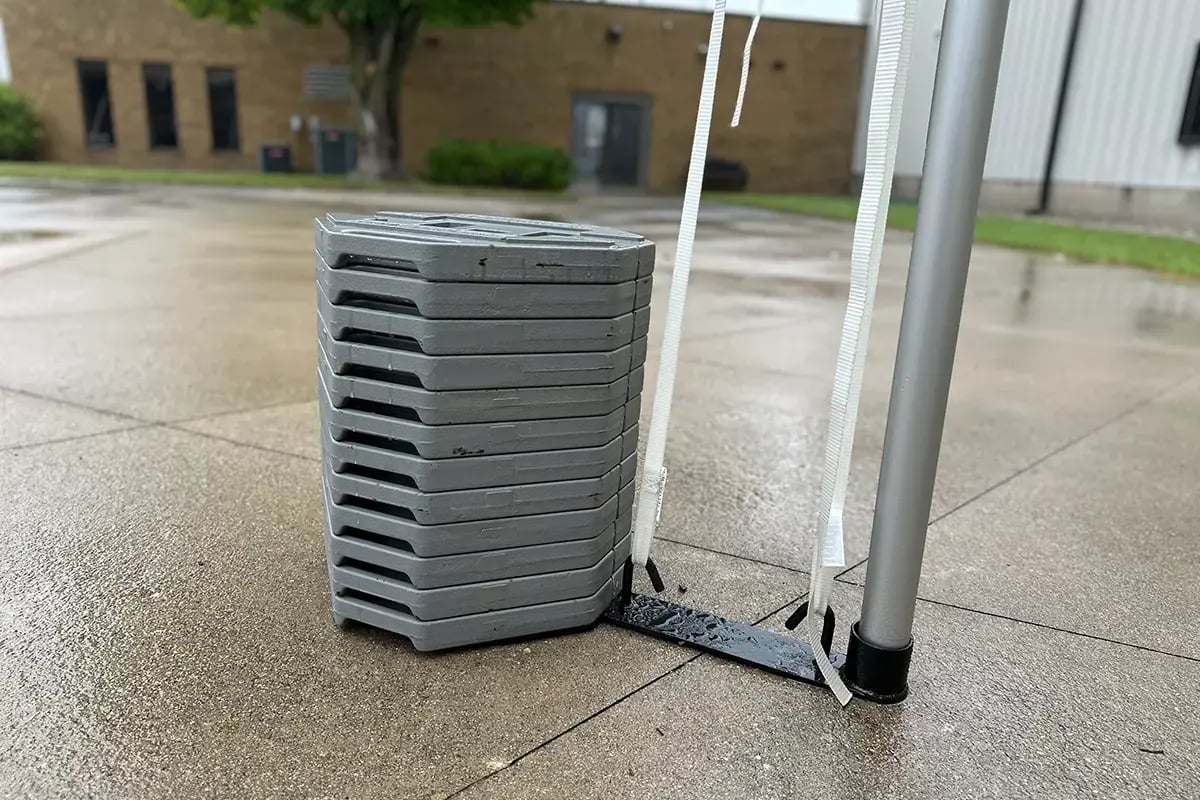
If the tent is properly ballasted, no one will talk about how your tent didn’t blow away, but if it did get tossed by the wind, it’d be the talk of the town if it broke or even worse, injured someone.
Consider:
-
Sun: UV-blocking fabrics, shaded demo areas, cooling colors
-
Wind: Proper ballasting (stakes, footplates, water barrels, etc.), reinforced frames, wind-resistant walls
-
Rain: Water-shedding canopies, gutters, covered tables and counters
-
Cold: Sidewalls, heaters, warm-toned lighting
Recommended Reading:
5 Best Pop Up Canopy Tents for Heavy Winds & Rain
Why Wind Ratings Matter When Choosing a Pop-Up Canopy Tent
The 5 Best Ways to Anchor a Canopy for High Winds (Whether on Sand and Soil or Concrete)
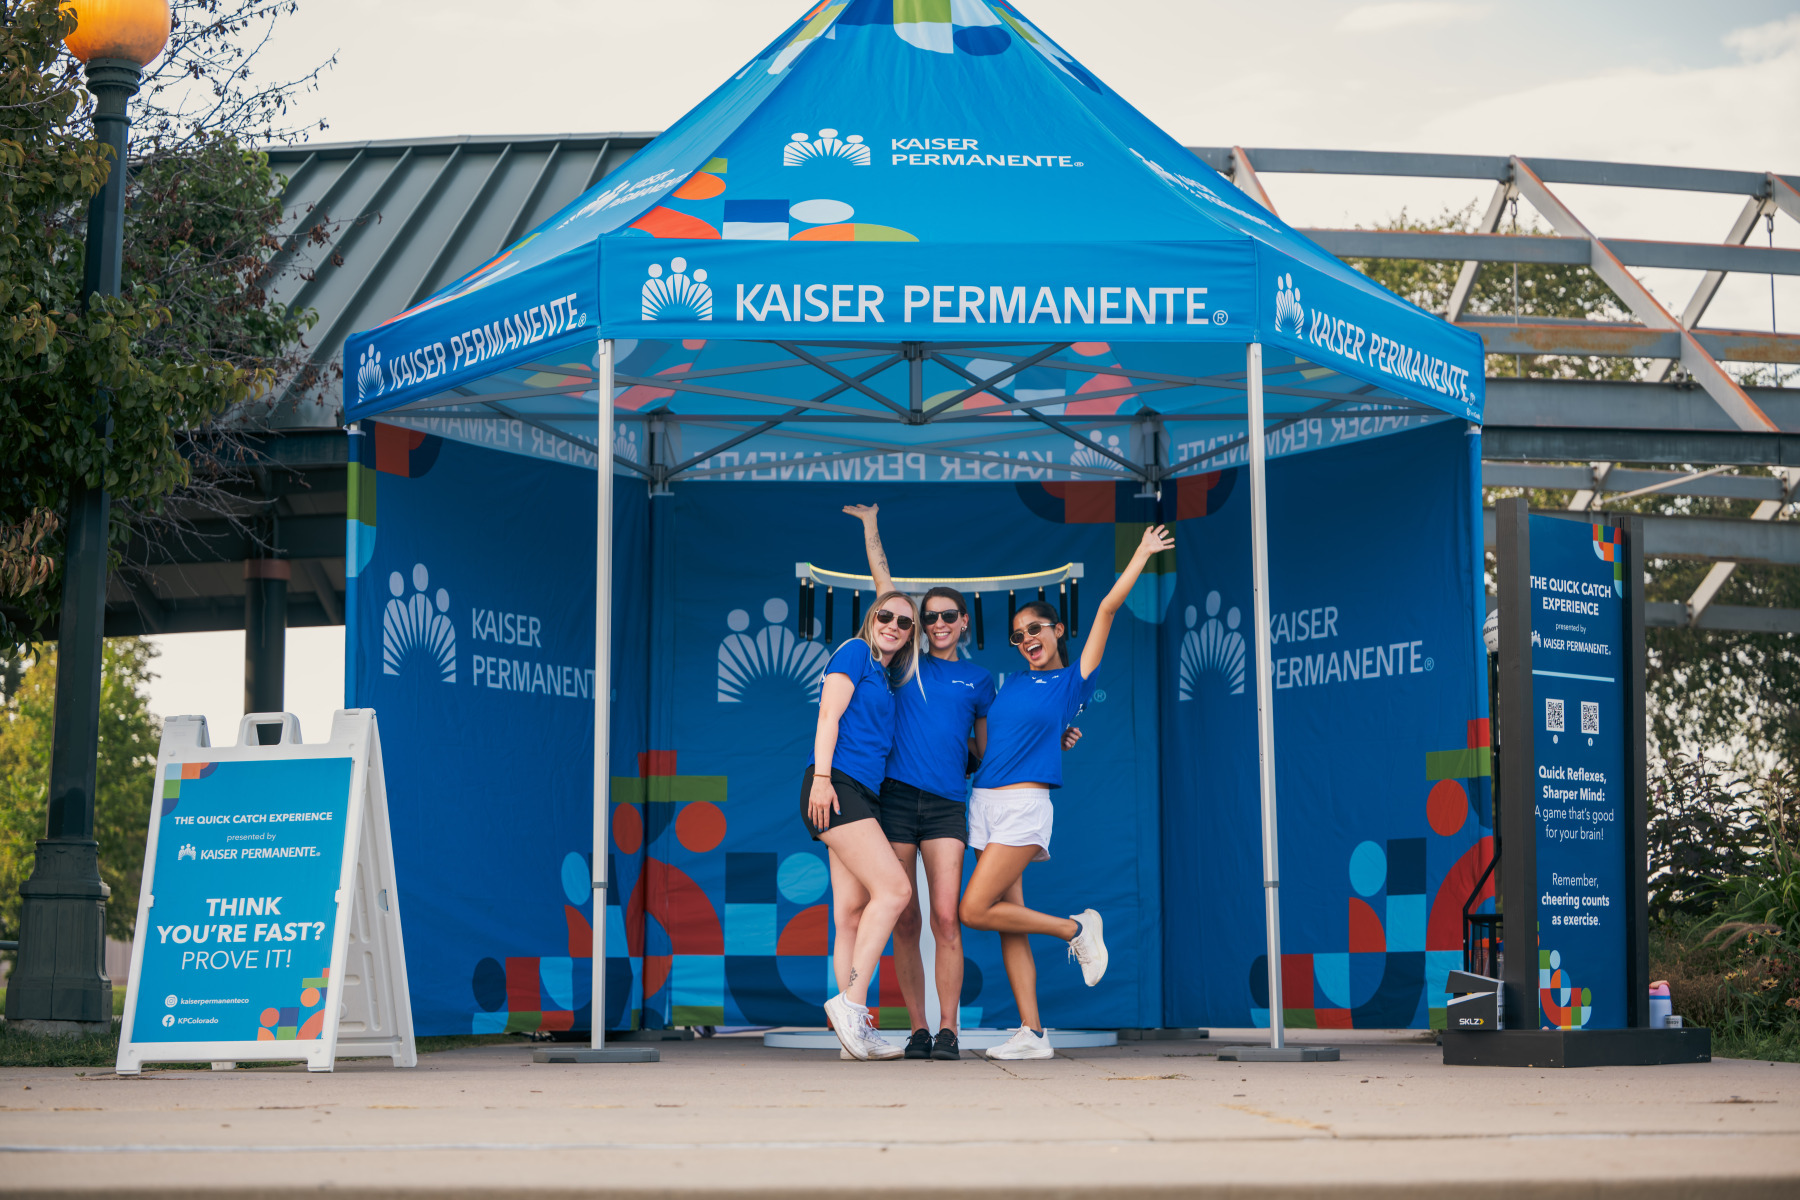
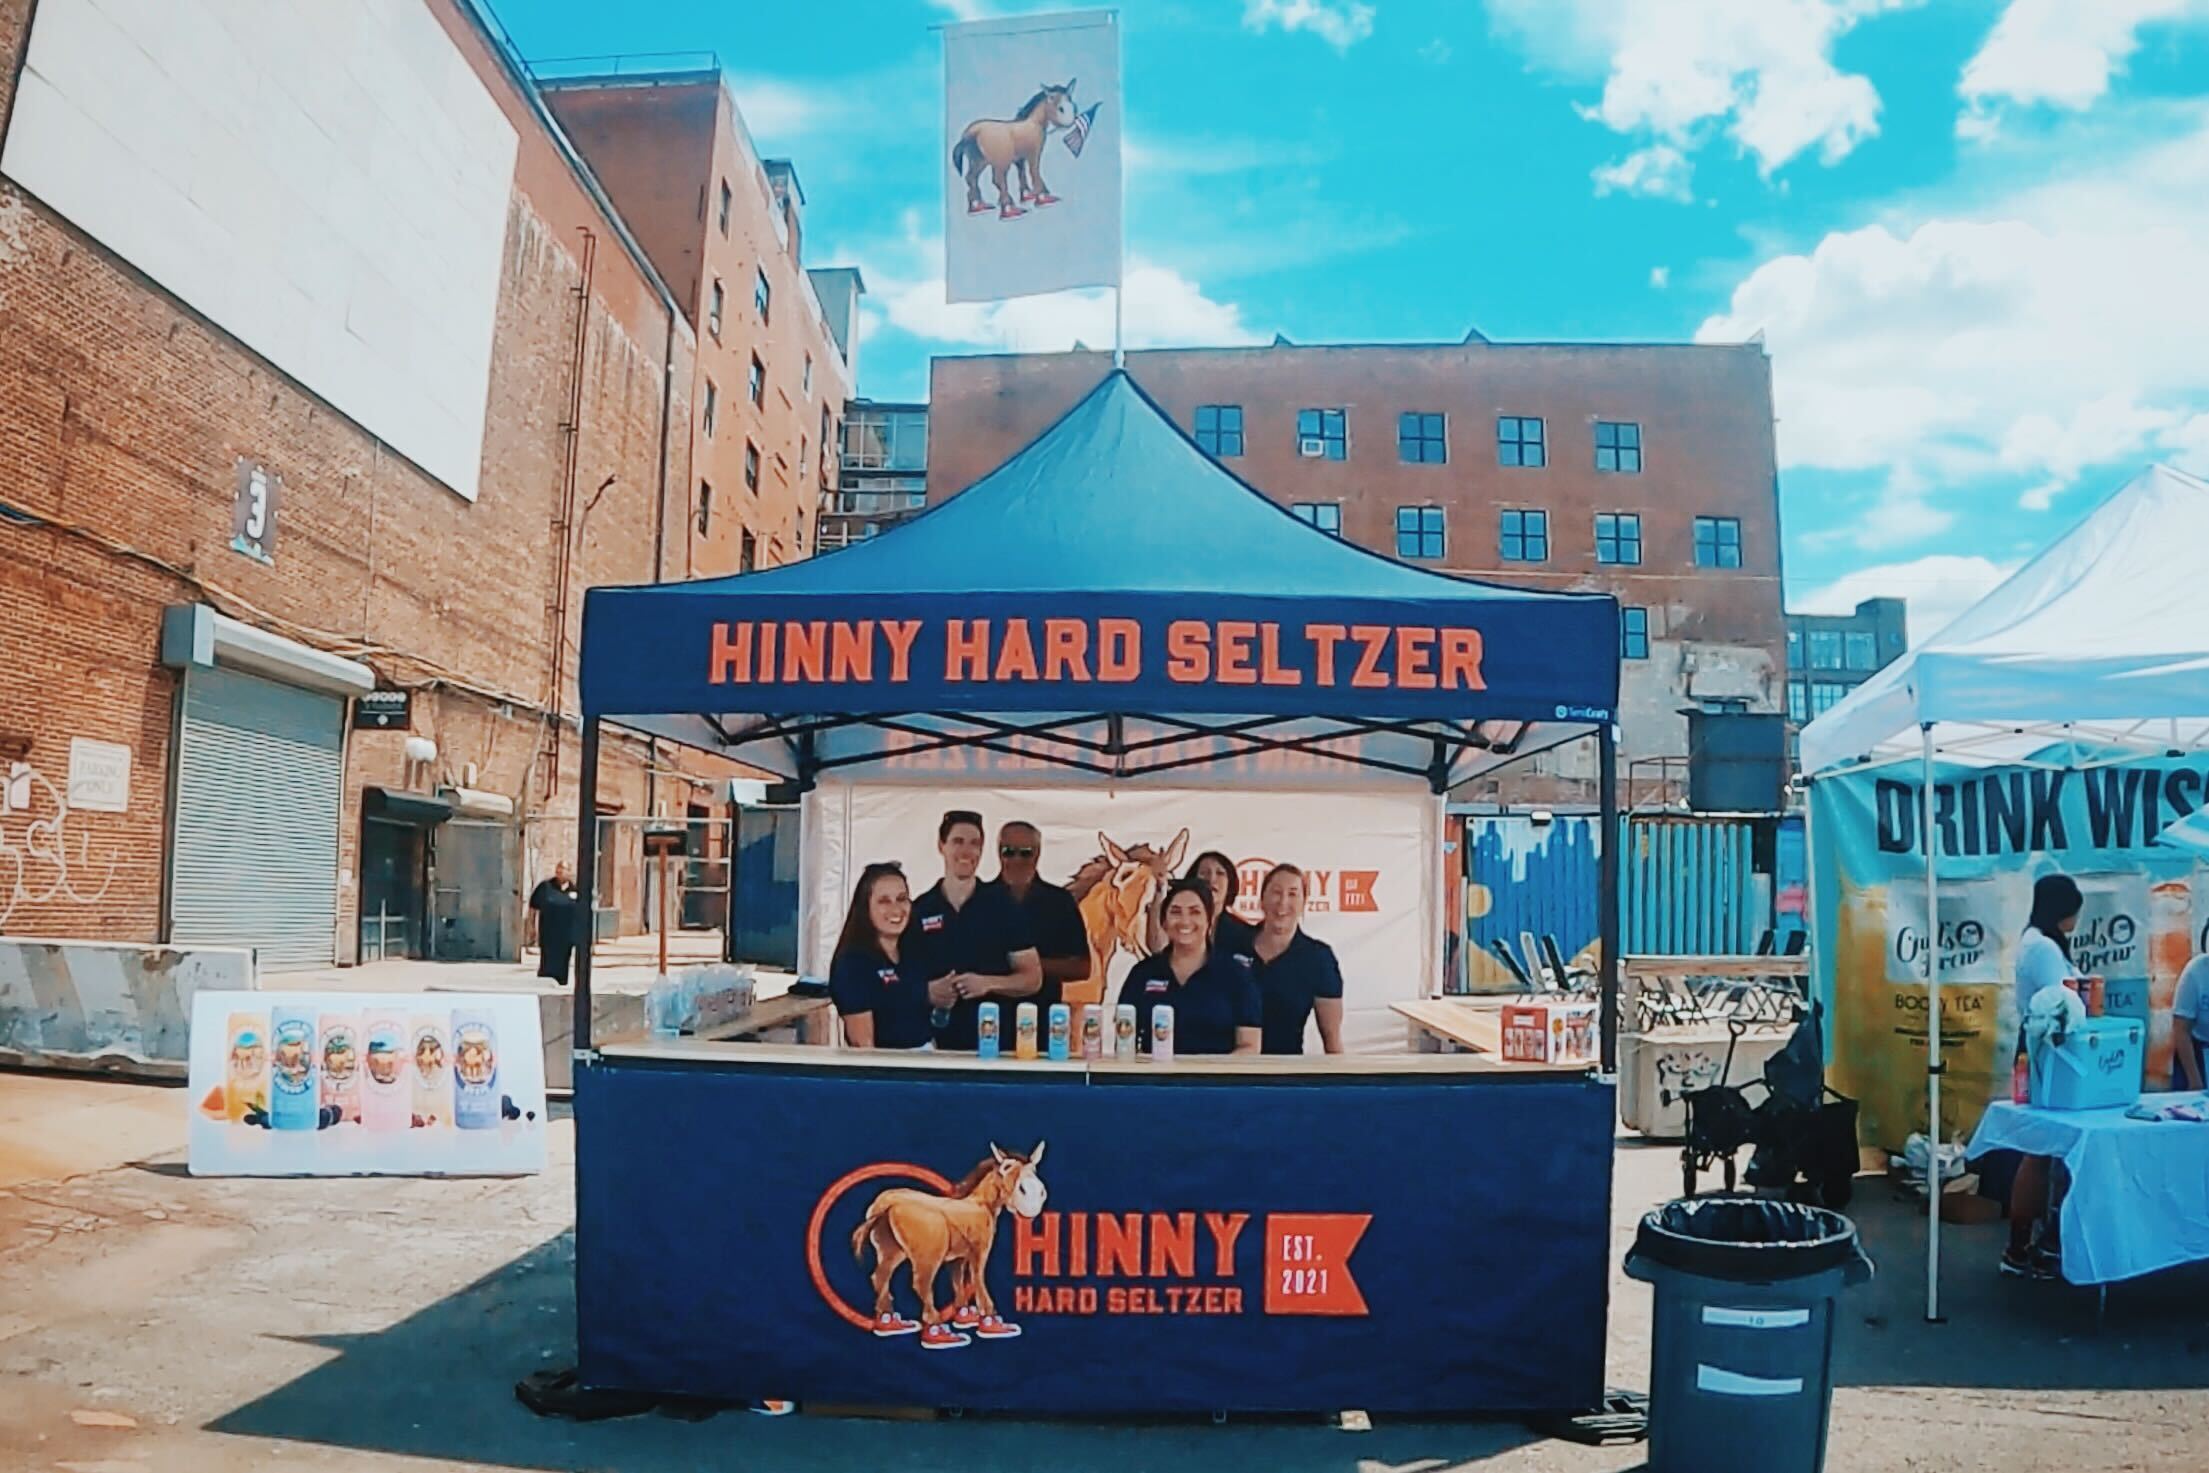
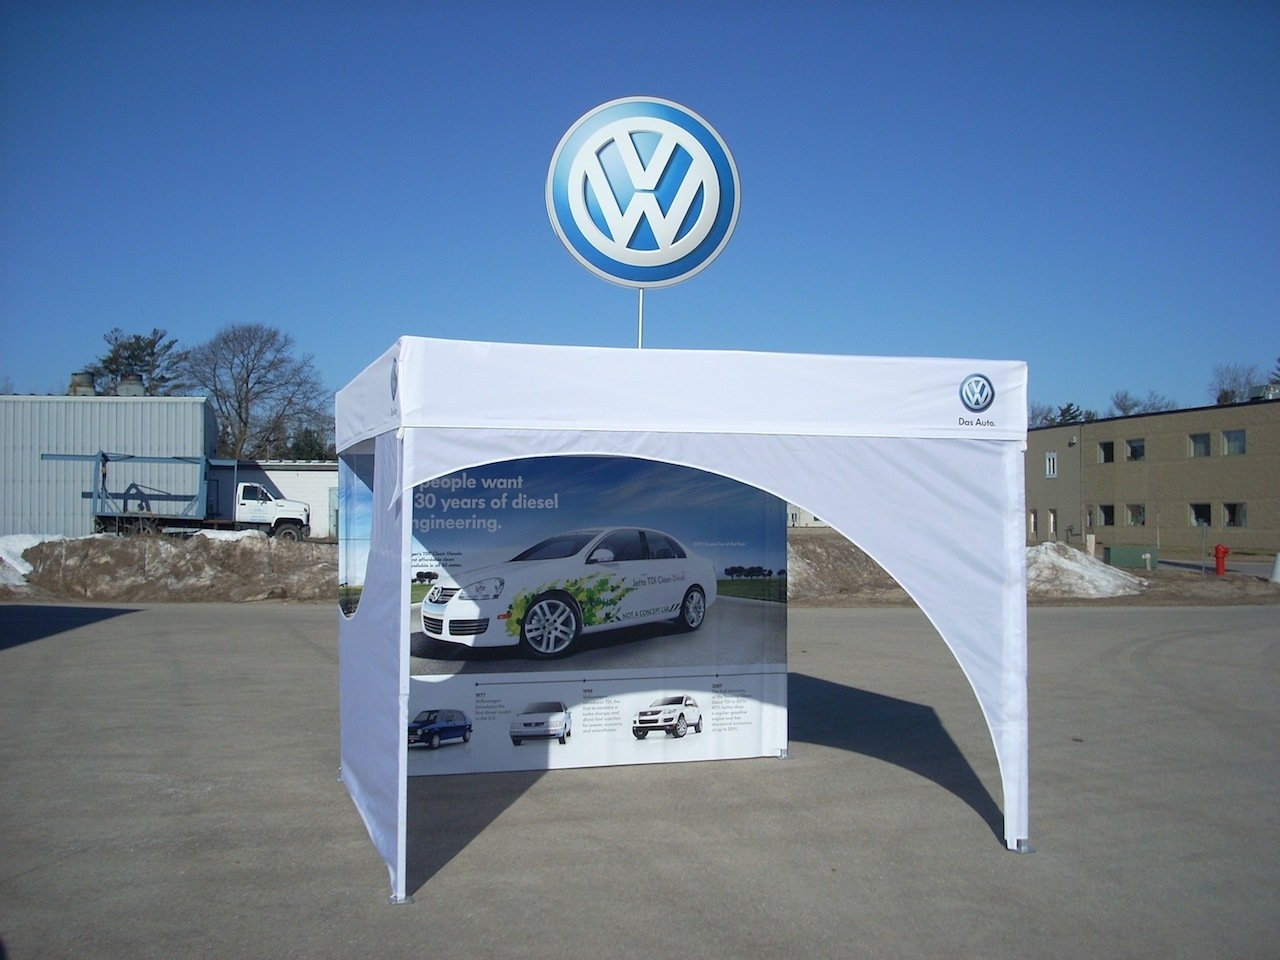
10. (Bonus Tip) Skirt White-Tent Requirements With Custom Accessories
Some events like large food festivals, community events, and certain sporting activations enforce strict “white tent only” rules.
The goal is uniformity; the downside is that your brand risks blending in with every other exhibitor at the event.
The workaround? Customizable tent accessories.
Even when the canopy must remain white, you can still add branded impact through:
-
Custom printed valances
-
Branded walls
-
Counter panels
-
Matching soft-goods or product displays
You’ll still want to check to make sure you’re within the compliance guidelines with your event hosts, but accessories should give you a way to stay compliant without sacrificing visibility or brand personality.

Feeling Better Prepared To Build a High-Impact Activation?
Your canopy tent is the centerpiece of your footprint, and when it’s designed with height, flow, functionality, and brand clarity in mind, it becomes a powerful engagement engine.
If you’re planning an upcoming activation and want expert guidance on layout, printing, or accessories, we’d love to collaborate.
You can either fill out a form to get started OR give us a call and talk to a real human during working hours at: (800) 950-4553.